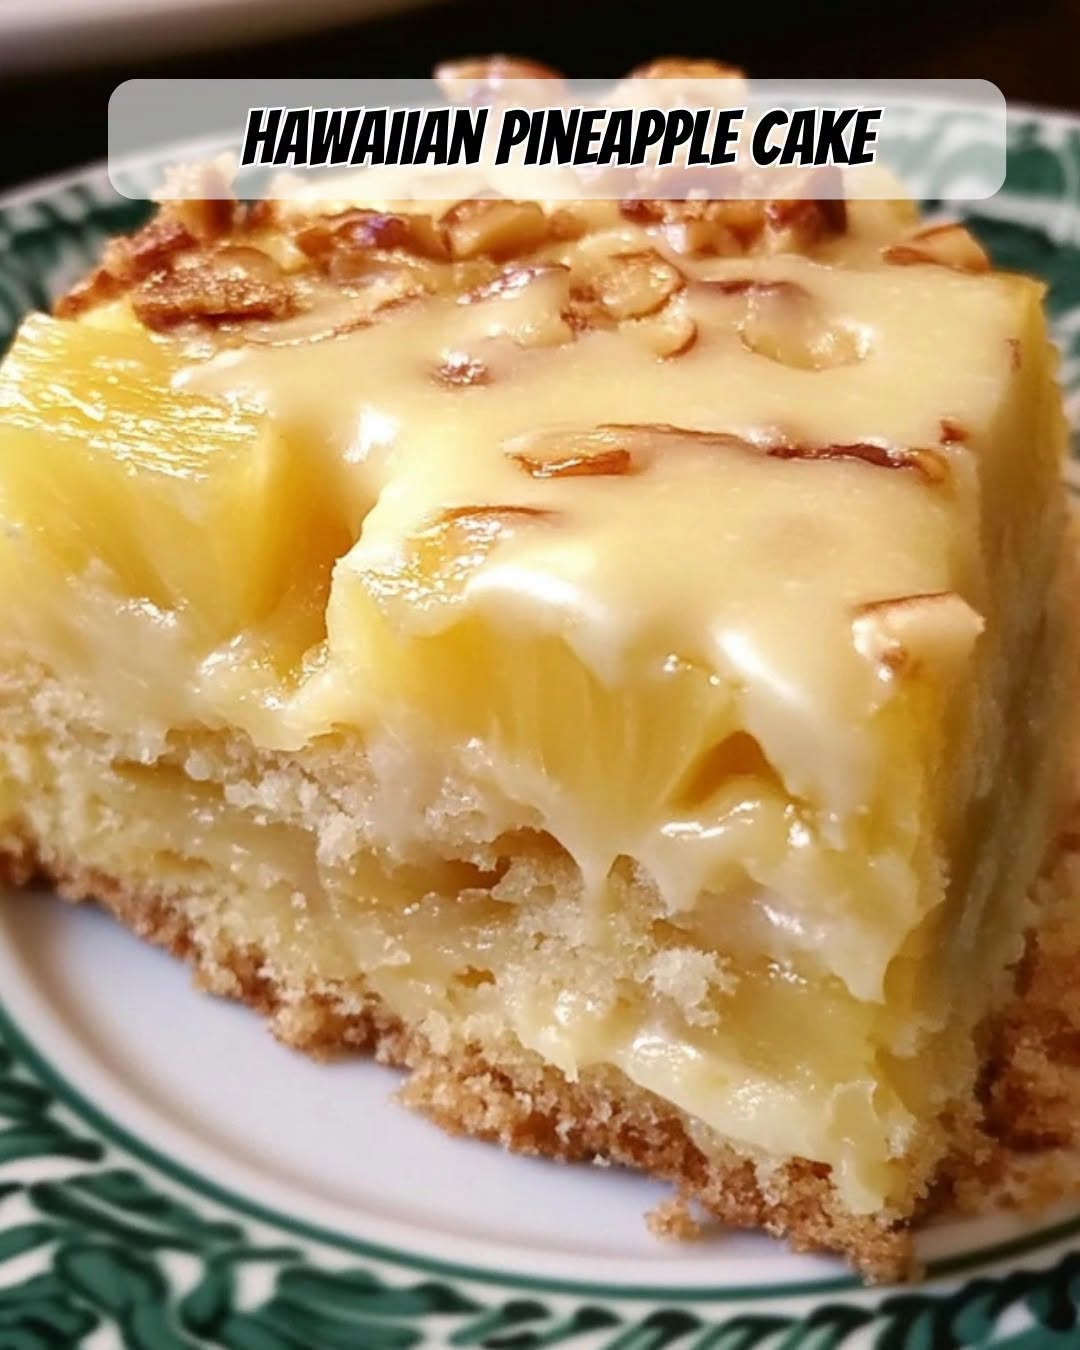
The base is a soft vanilla cake infused with pineapple flavor. The pudding filling creates creamy pockets throughout the cake, making every bite rich and moist. Then comes the whipped topping, followed by toasted coconut that adds texture, aroma, and a beautiful golden finish.
The combination is what makes this dessert memorable.
You get the sweetness of pineapple, the smoothness of pudding, the lightness of whipped cream, and the nutty flavor of toasted coconut all working together.
And the best part?
You do not need advanced baking skills.
This is a dessert designed for real kitchens, real schedules, and real people who want something delicious without spending all day in front of the oven.
Ingredients You’ll Need
Most of the ingredients are simple items you can find at any grocery store.
You will need:
• 1 box (15.25 oz) French vanilla or yellow cake mix
• Ingredients listed on the cake mix package, usually eggs and oil
• 1 can (20 oz) crushed pineapple, drained (save the juice)
• 1 package (3.4 oz) coconut cream instant pudding mix
• 1 package (3.4 oz) vanilla instant pudding mix
• 4 cups cold milk
• 1/2 cup sweetened shredded coconut
• 1 container (16 oz) whipped topping or about 3 cups fresh whipped cream
• Maraschino cherries or pineapple slices for decoration, optional
You will also need a 9×13 baking dish, mixing bowl, whisk or hand mixer, and a wooden spoon.
That wooden spoon will become the most important tool later.
Creating the Perfect Cake Base
The magic begins with the cake.
Prepare the cake mix according to the package directions, but with one simple upgrade.
Instead of using water, replace it with the reserved pineapple juice from the crushed pineapple.
This small change adds a deeper tropical flavor and helps create a cake that tastes far more special than a standard boxed mix.
If you do not have enough pineapple juice to reach the amount required by the package instructions, simply add water until you have the correct measurement.
Once mixed, pour the batter into your prepared baking dish and bake according to the package directions until the cake turns golden and feels springy when lightly touched.
After removing it from the oven, allow it to cool for about 10 to 15 minutes.
Now the real fun begins.
The Poke Cake Transformation
The reason this dessert is called a poke cake is because of what happens next.
Take the handle of a wooden spoon and gently poke holes throughout the top of the cake. Try to space them evenly so the filling can spread throughout the dessert.
You are not trying to break the cake apart.
You are simply creating little pathways for the creamy filling to travel.
Next, prepare the pudding mixture.
Whisk together the coconut cream pudding mix, vanilla pudding mix, and cold milk until the mixture thickens slightly but remains easy to pour.
Add the crushed pineapple and stir everything together.
Then pour the mixture over the cake, allowing it to flow into the holes you created.
This is one of the most satisfying moments of the entire recipe because you know every slice will contain hidden pockets of creamy pineapple flavor.
Cover the cake and place it in the refrigerator for at least one hour.
Do not rush this step.
The chilling time allows the pudding to set and gives all the flavors a chance to blend together.
The Secret Weapon: Toasted Coconut
The toasted coconut topping might seem like a small detail, but it is one of the things that makes this dessert stand out.
Toasting the coconut brings out its natural flavor and creates a slightly crisp texture that balances the softness of the cake.
Spread the shredded coconut on a baking sheet and toast it at 350°F for a few minutes, stirring frequently.
Keep a close eye on it because coconut can change quickly from perfectly golden to over-toasted.
A little attention here creates a big difference.
The Final Tropical Touch
Once the cake has fully chilled, it is time for the finishing layer.
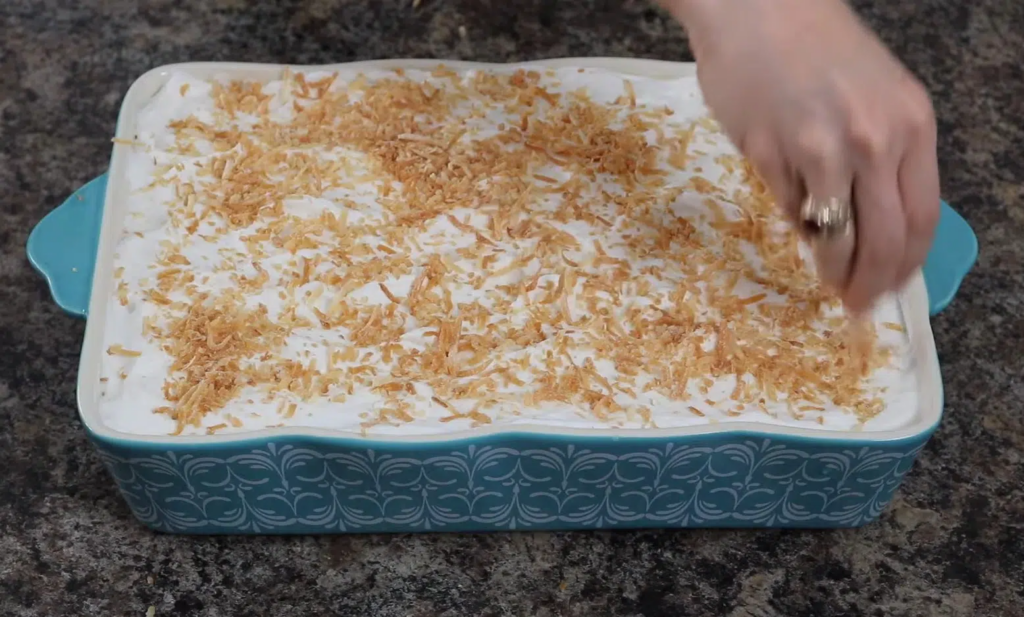
Spread whipped topping generously across the surface, smoothing it out like frosting.
Then sprinkle the toasted coconut over the top.
This is the moment when the dessert truly comes together. The fluffy white topping and golden coconut make the cake look like something from a tropical bakery.
If you want to make it even more festive, add cherries or pineapple slices before serving.
The bright colors make it perfect for birthdays, holidays, summer gatherings, or any occasion that needs a little extra sweetness.
How to Store Hawaiian Pineapple Coconut Poke Cake
This cake should always be stored in the refrigerator.
Cover it tightly with plastic wrap, and it will stay fresh for about 3 to 4 days.
In fact, many people find that the flavor improves after sitting overnight because the layers have more time to combine.
This dessert also freezes well.
After the cake has chilled completely, wrap it tightly with plastic wrap and aluminum foil. It can be stored in the freezer for up to three months.
When you are ready to enjoy it, simply thaw it overnight in the refrigerator.
Why This Recipe Keeps Coming Back
Some recipes are complicated but impressive.
Others are simple but forgettable.
This one manages to be both easy and memorable.
That is why it has become a favorite for potlucks, family gatherings, celebrations, and those random days when you just want a dessert that feels special.
It gives the appearance of a dessert that required hours of effort, when the truth is that most of the magic happens while it chills.
And that is exactly what makes it such a winner.
The best desserts are not always the ones with the longest ingredient lists or the most complicated instructions.
Sometimes they are the ones that create a feeling.
This Hawaiian pineapple coconut poke cake is more than just cake.
It is sunshine in a baking dish.
It is a tropical escape without a plane ticket.
It is proof that a simple recipe can still create something unforgettable.
So preheat your oven, grab your ingredients, and bring a little island-inspired sweetness into your kitchen.
No passport required.